Custom External M.2 SSD Build
This is a quick blog post detailing the steps to setting up a high-speed external SSD as well as the advantages over pre-built external SSDs.
Parts I am using:
Contents
- SSD vs HDD vs USB
- Enclosures USB3.1 vs USB3.0
- Custom vs Pre-built
External SSD
There were three things that affected my personal purchase; form factor, performance and price.
SSDs come in a variety of different form factors, the two most common are a simple 2.5 inch drive, and M.2 2280. The 2.5 inch drive has dimensions 70x100mm (70 square cm) whereas the most common M.2 has dimensions 22x80mm (as the naming 2280 suggests) (17.6 square cm). Meaning that an M.2 has a quarter of the footprint. Bringing it close to a USB stick that have around 10 square cm top-down area.
So I personally went with a small M.2 drive with a custom enclosure I will talk about later
SSDs also have vast performance gains over USB sticks (I benchmarked my 250gb MX500 SSD vs a Sandisk Ultra 32GB USB, the results are in the next section). Most tech-enthusiasts know better than to look at pure read/write speeds and also look at IOPS which give us a better idea of how the drive will perform in real-world situations. An Operating System drive has to have extremely low latency and be able to quickly write and read data. SSDs have special controllers that help them do this, USBs usually do not.
SSD vs HDD vs USB
Here is a performance table representing the differences in drives. The SSD was connected via USB3.1, the USB via USB3.0 and the HDD via direct SATA III. The SSD was a 250GB M.2 500GB MX500, the USB was a 32GB SanDisk Ultra and the HDD was a 1TB WD Blue
| Performance |
SSD (MX500) |
USB (SanDisk) |
HDD (WD Blue) |
| Sequential Read |
543.293 MB/s |
118.407 MB/s |
142.8 MB/s |
| Sequential Write |
479.154 MB/s |
43.561 MB/s |
159.8 MB/s |
| Random Read 4KiB |
112.409 MB/s |
5.639 MB/s |
0.388 MB/s |
| Random Write 4KiB |
105.469 MB/s |
2.030 MB/s |
1.295 MB/s |
| Cost per GB |
$0.20 - $0.28 |
$0.26 - $0.3 |
$0.026 - $0.05 |
From this table it is easy to see why an SSD in a USB form factor is preferable. The costs of SSD and USBs are similar, however USBs have much lower total storage and thus total cost. HDDs are obviously still far cheaper, but the performance, form factor and physical liability of them getting damaged during transport makes them useless for our scenario.
Enclosures USB3.1 vs USB3.0
When choosing an enclosure there are a few things we will need to think about. The price, ventilation, quality, compatability and connector. There is no point getting an expensive SSD and using USB2.0 for example. So we will assume we will be using USB3.0 or USB3.1.
The price is usually between $10 and $25 for an M.2 enclosure.
For the Compatability we have to be careful, M.2 SSDs usually come in different sizes. The Enclosure I used accepts most M.2 SSDs with a 2280 form factor.
Ventilation is also a valid concern, as M.2 SSDs output a fair amount of heat during continuous use. Using my enclosure my SSD regularly hovered around 70 degrees, I did not notice any performance loss during stress tests, however it was uncomfortable to touch the enclosure.
| Performance |
Wavlink via USB3.1 |
Wavlink via USB3.0 |
| Sequential Read |
543.293 MB/s |
412.187 MB/s |
| Sequential Write |
479.154 MB/s |
410.192 MB/s |
| Random Read 4KiB |
112.409 MB/s |
130.969 MB/s |
| Random Write 4KiB |
105.469 MB/s |
134.934 MB/s |
We can see very similar results, with faster read/write on USB3.1 but strangely we get a 20% loss in IOPS. This may be due to a low-quality USB-C cable that came with the enclosure.
Custom vs Pre-built
It is much easier to buy a pre-built external SSD such as the famous Samsung T5. It's however not much fun, and also means you are forced into using a few manufacturers, and cannot reuse older SSDs. Many people have SSDs lying around that they want to re-use. It also means you have full control of what is going on, and it can often be cheaper. For example an external SSD 250gb costs roughly $110 on amazon, whereas my build cost around $90.
Build Guide
The Wavlink Enclosure comes with everything we need to build our external SSD (Except for the SSD). It comes with the Enclosure, 2 Cables (USB C, and USB3.0), a screw driver, 2 extra screws and the guide book.
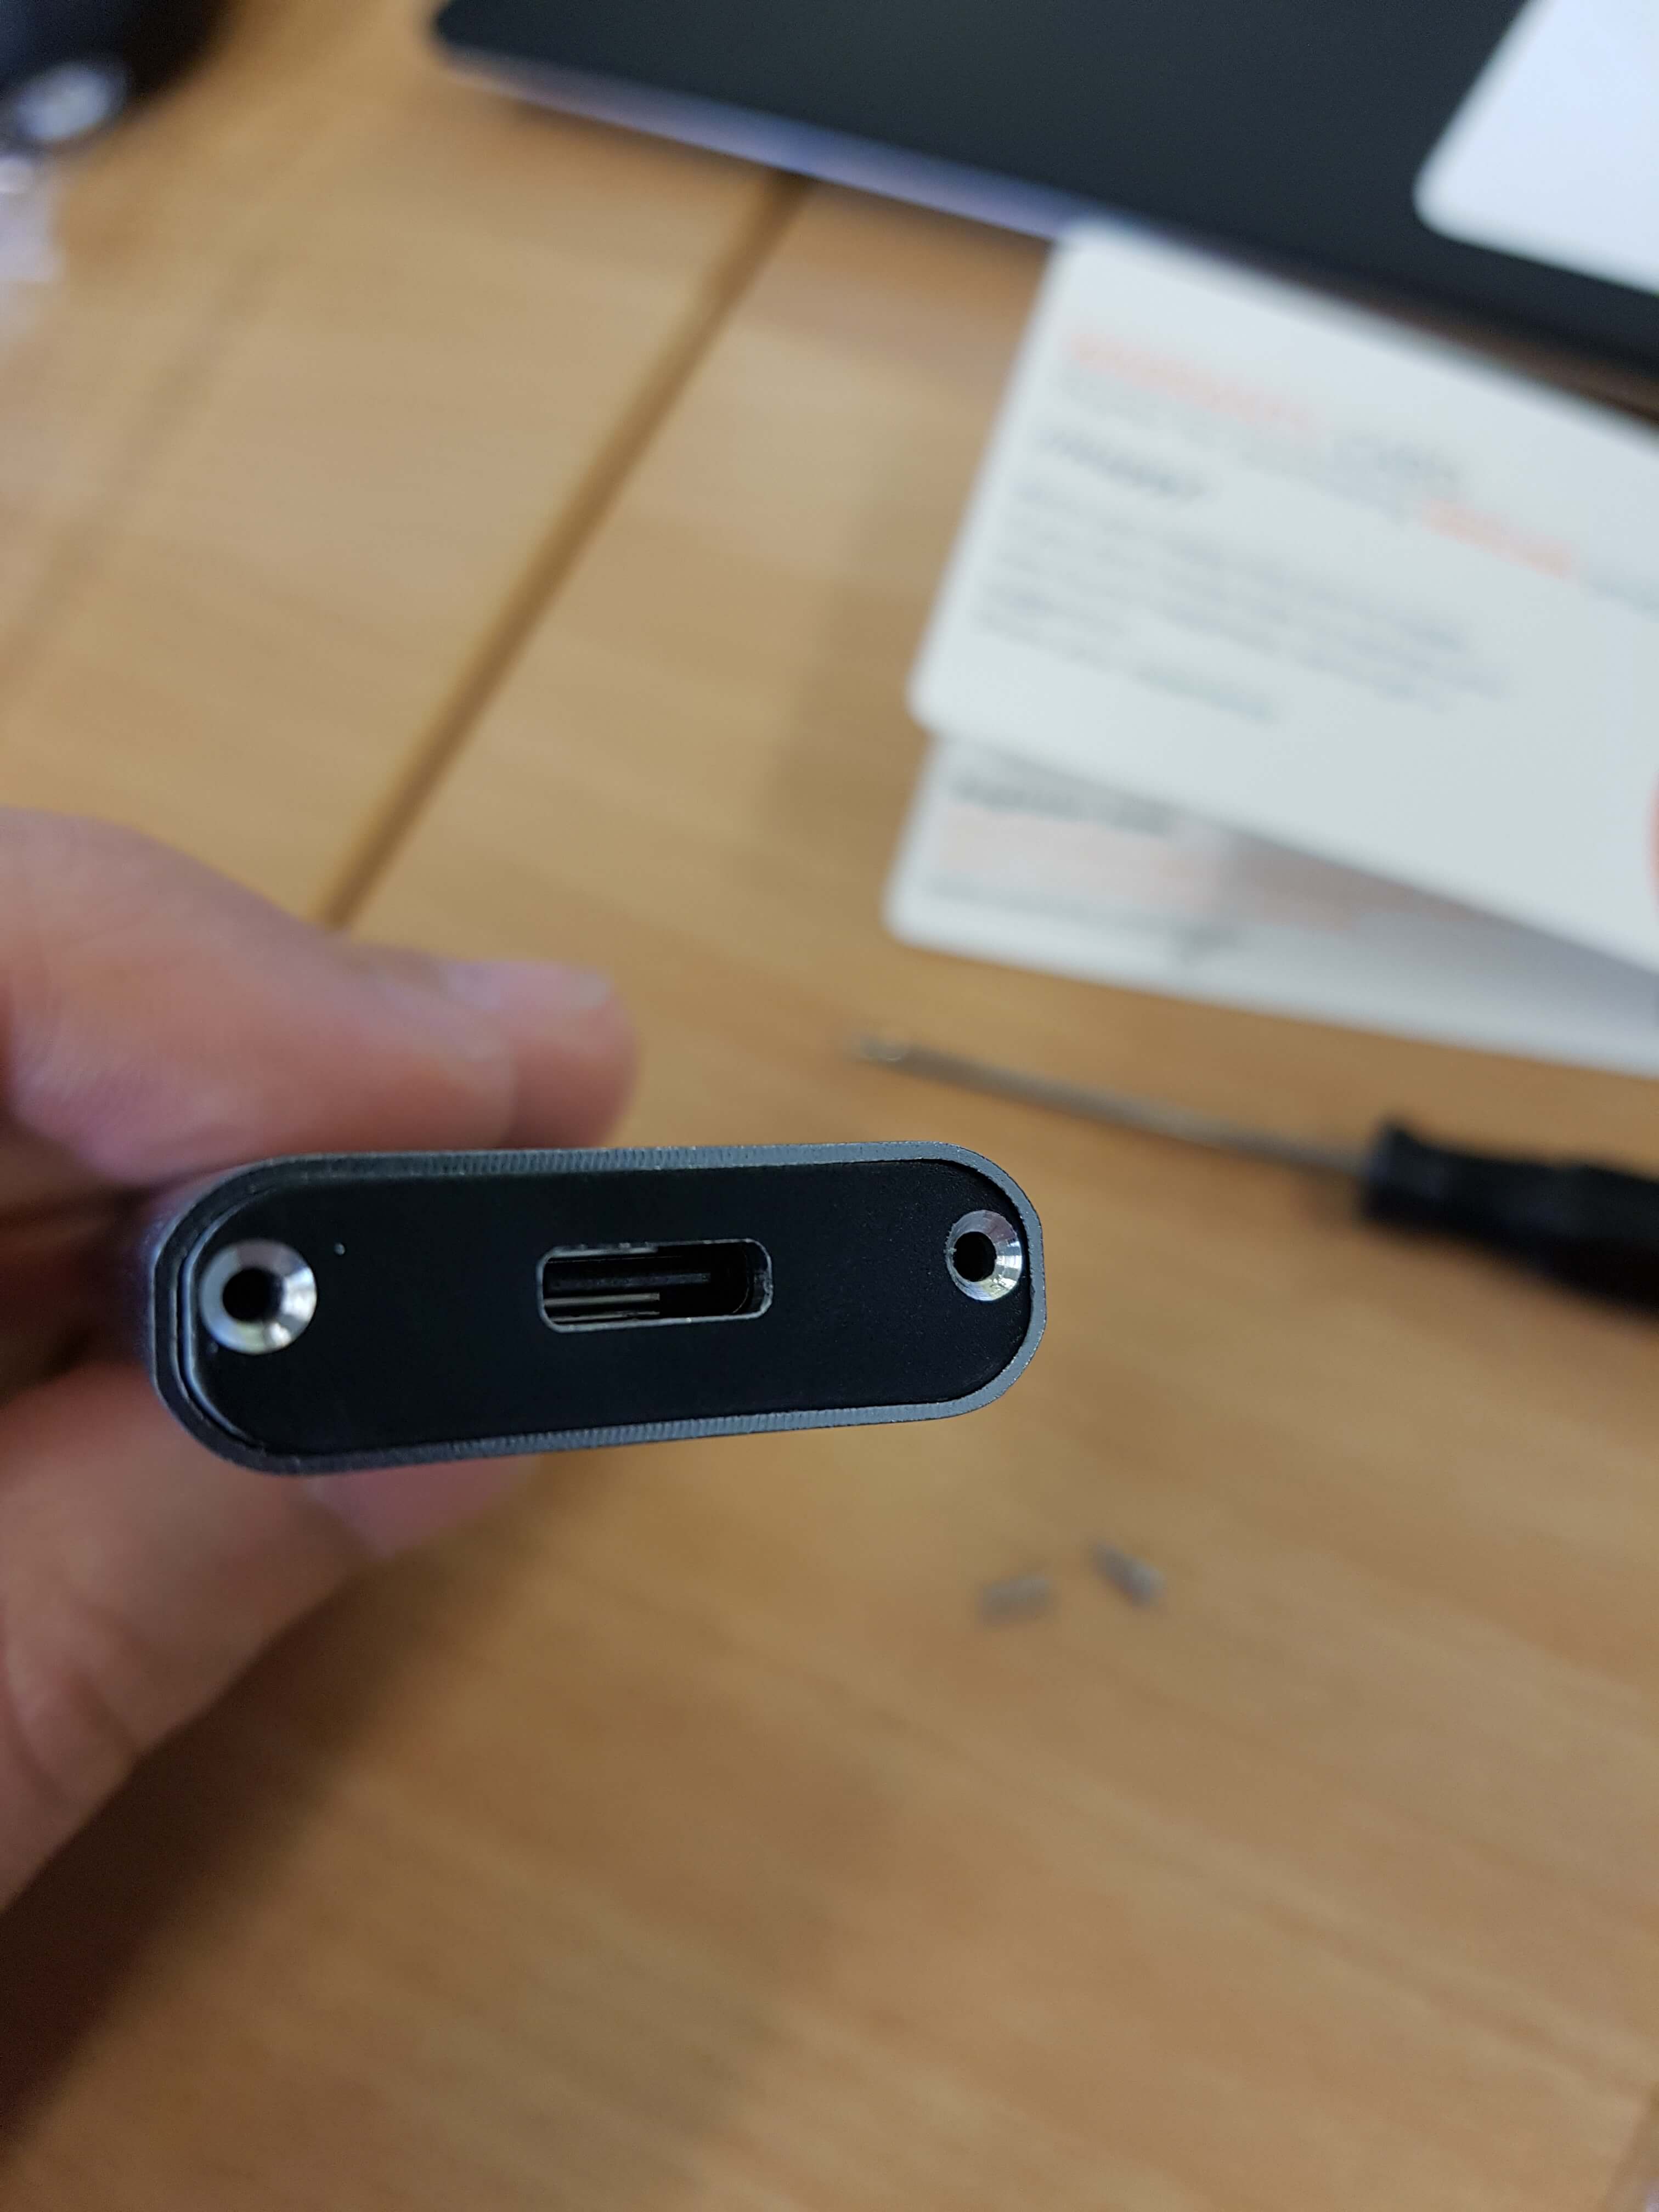
After unboxing it, you can unscrew the 2 screws gently that hold the front piece on.
The front piece has a thick sticky material behind it for spacing and to hold it in place. Removing it was a bit of an annoyance. Be careful not to damage it. I personally stuck in one of the USB cables which pulled it out successfully.
You can now gently remove the loose PCB inside of the enclosure.
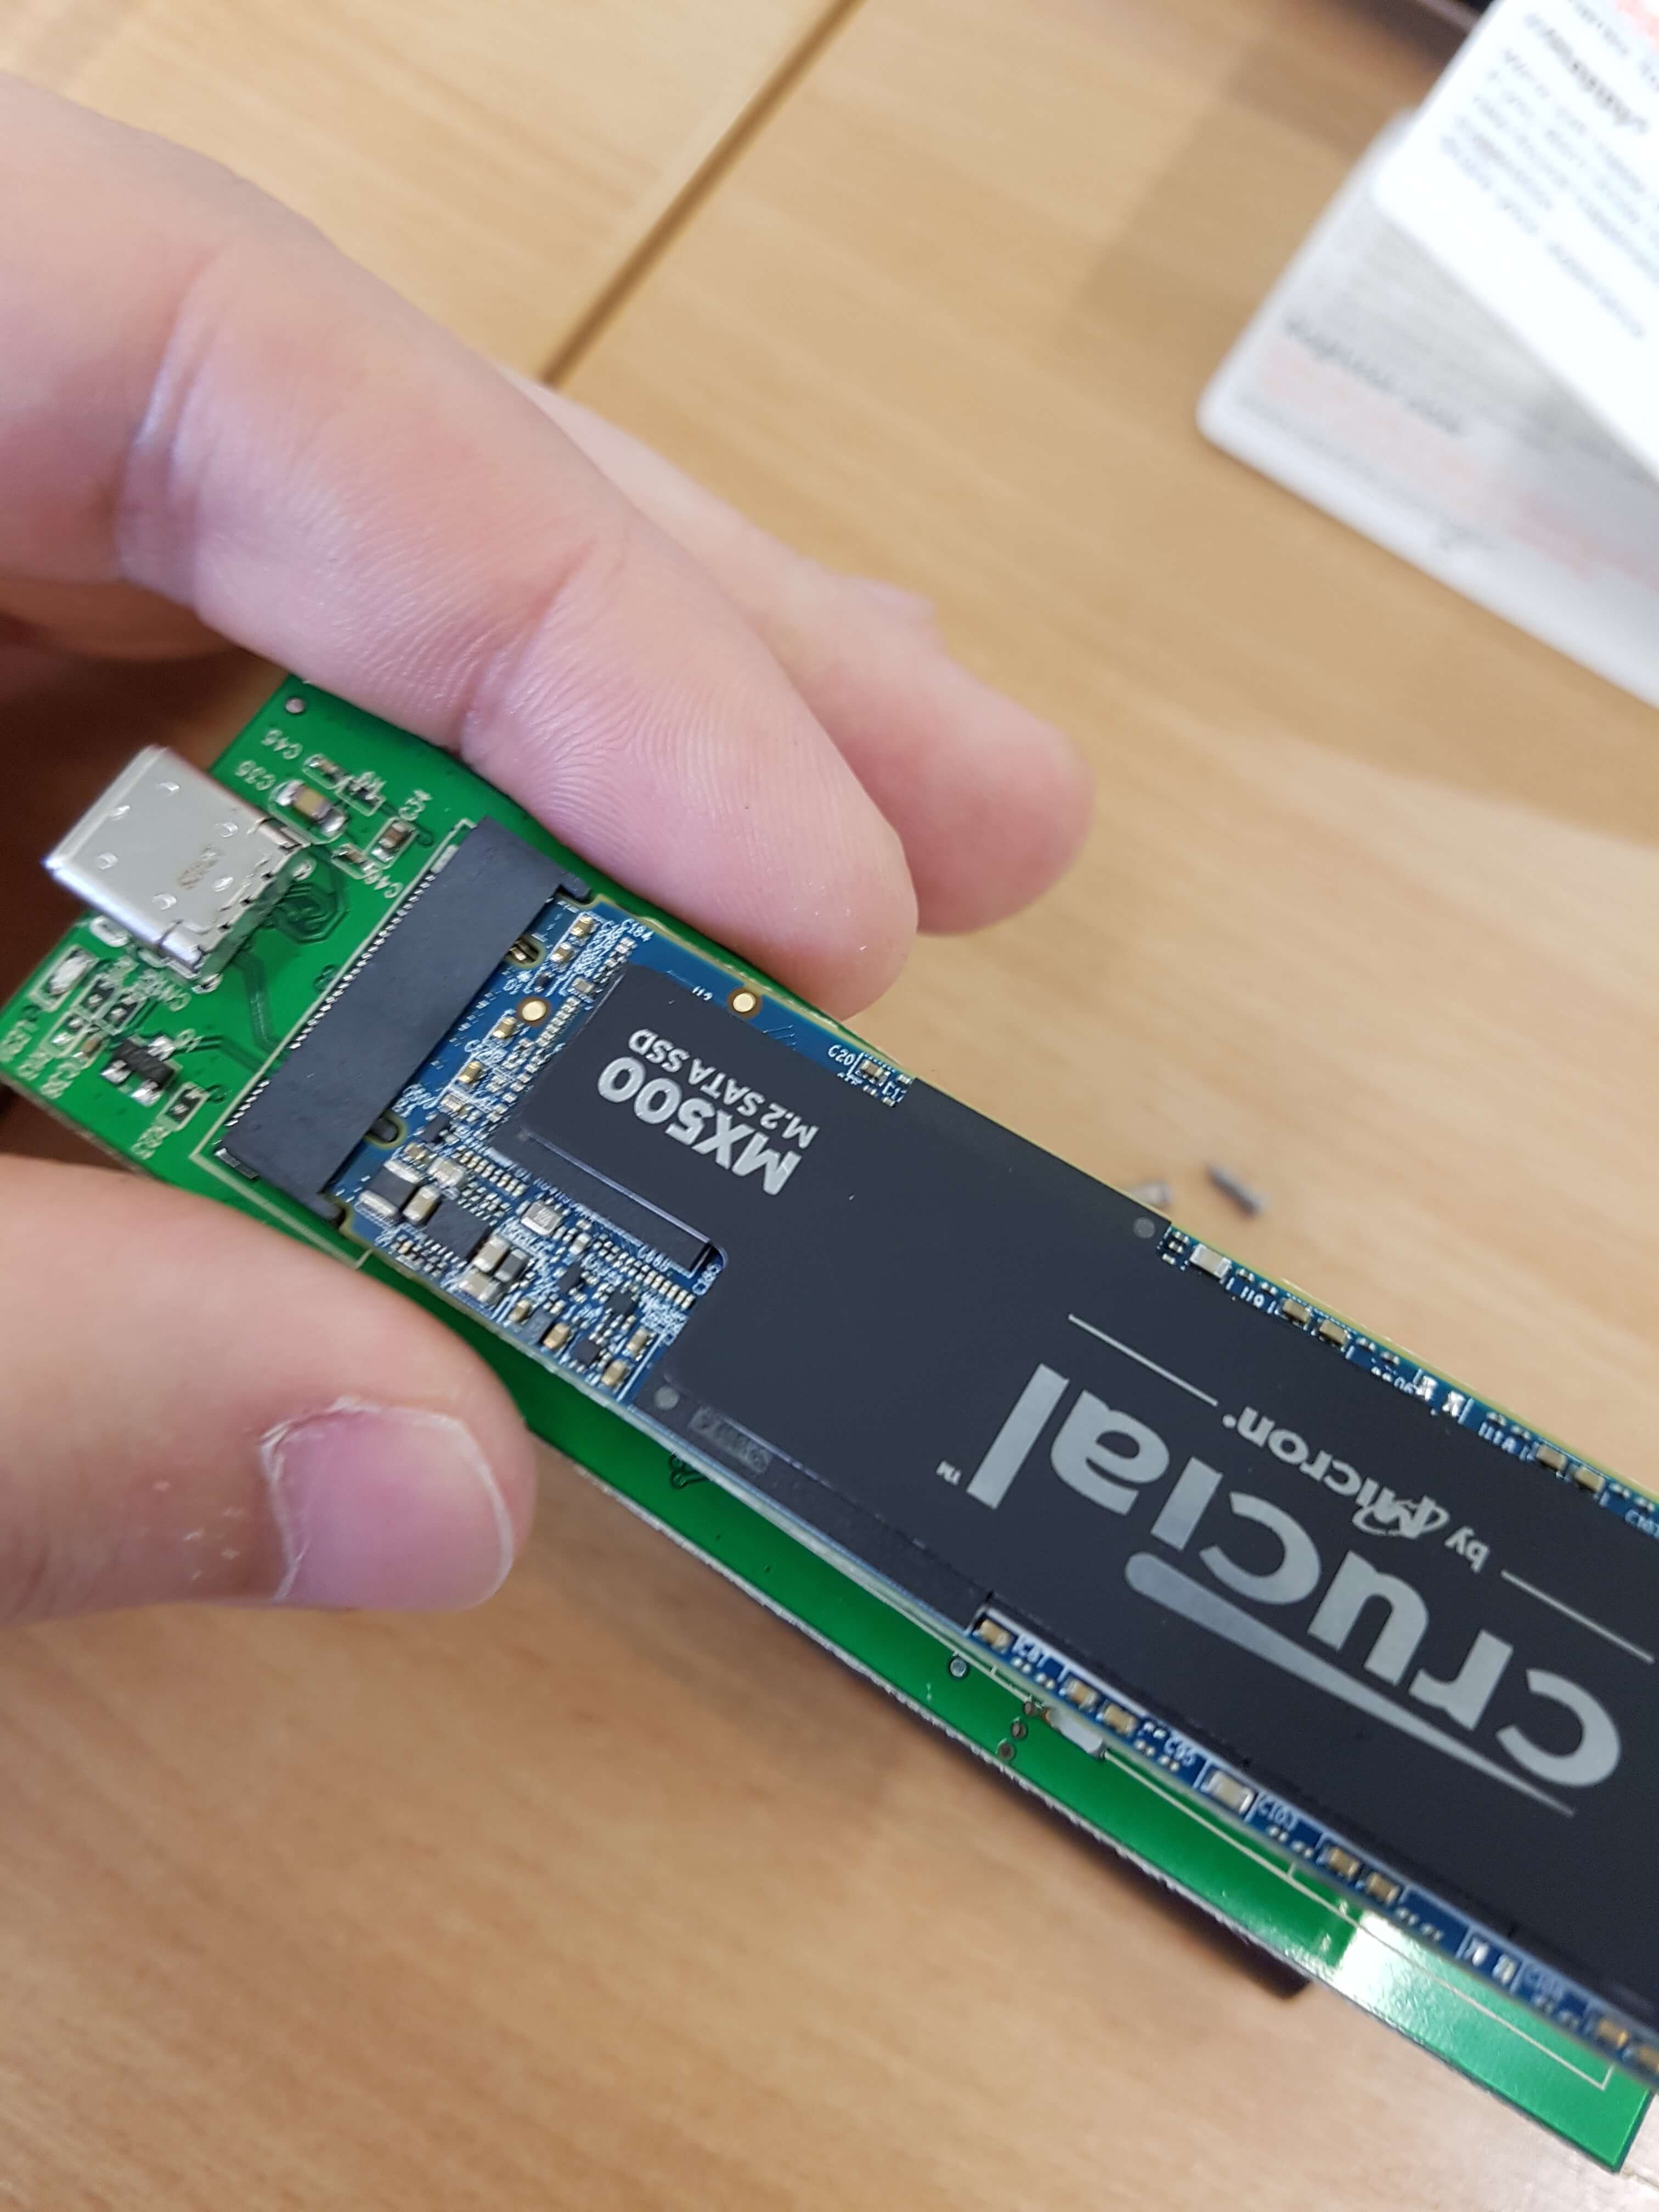
We can now see the PCB with all it's pretty chips :).
You can clearly see where the SSD will be placed. Some people have talked about the PCB being a little loose (although I have never experienced this), so you may want to put a NON-conductive material at the back, such as thermal-pads to keep it in place.
From how tight the PCB and the Enclosure are we can clearly see that heat may be an issue, to fix this you can try thermal-pads (although I doubt that would help), or mod the enclosure and make some ventilation holes for your SSD. I suggest stress-testing it first and see if you need it.
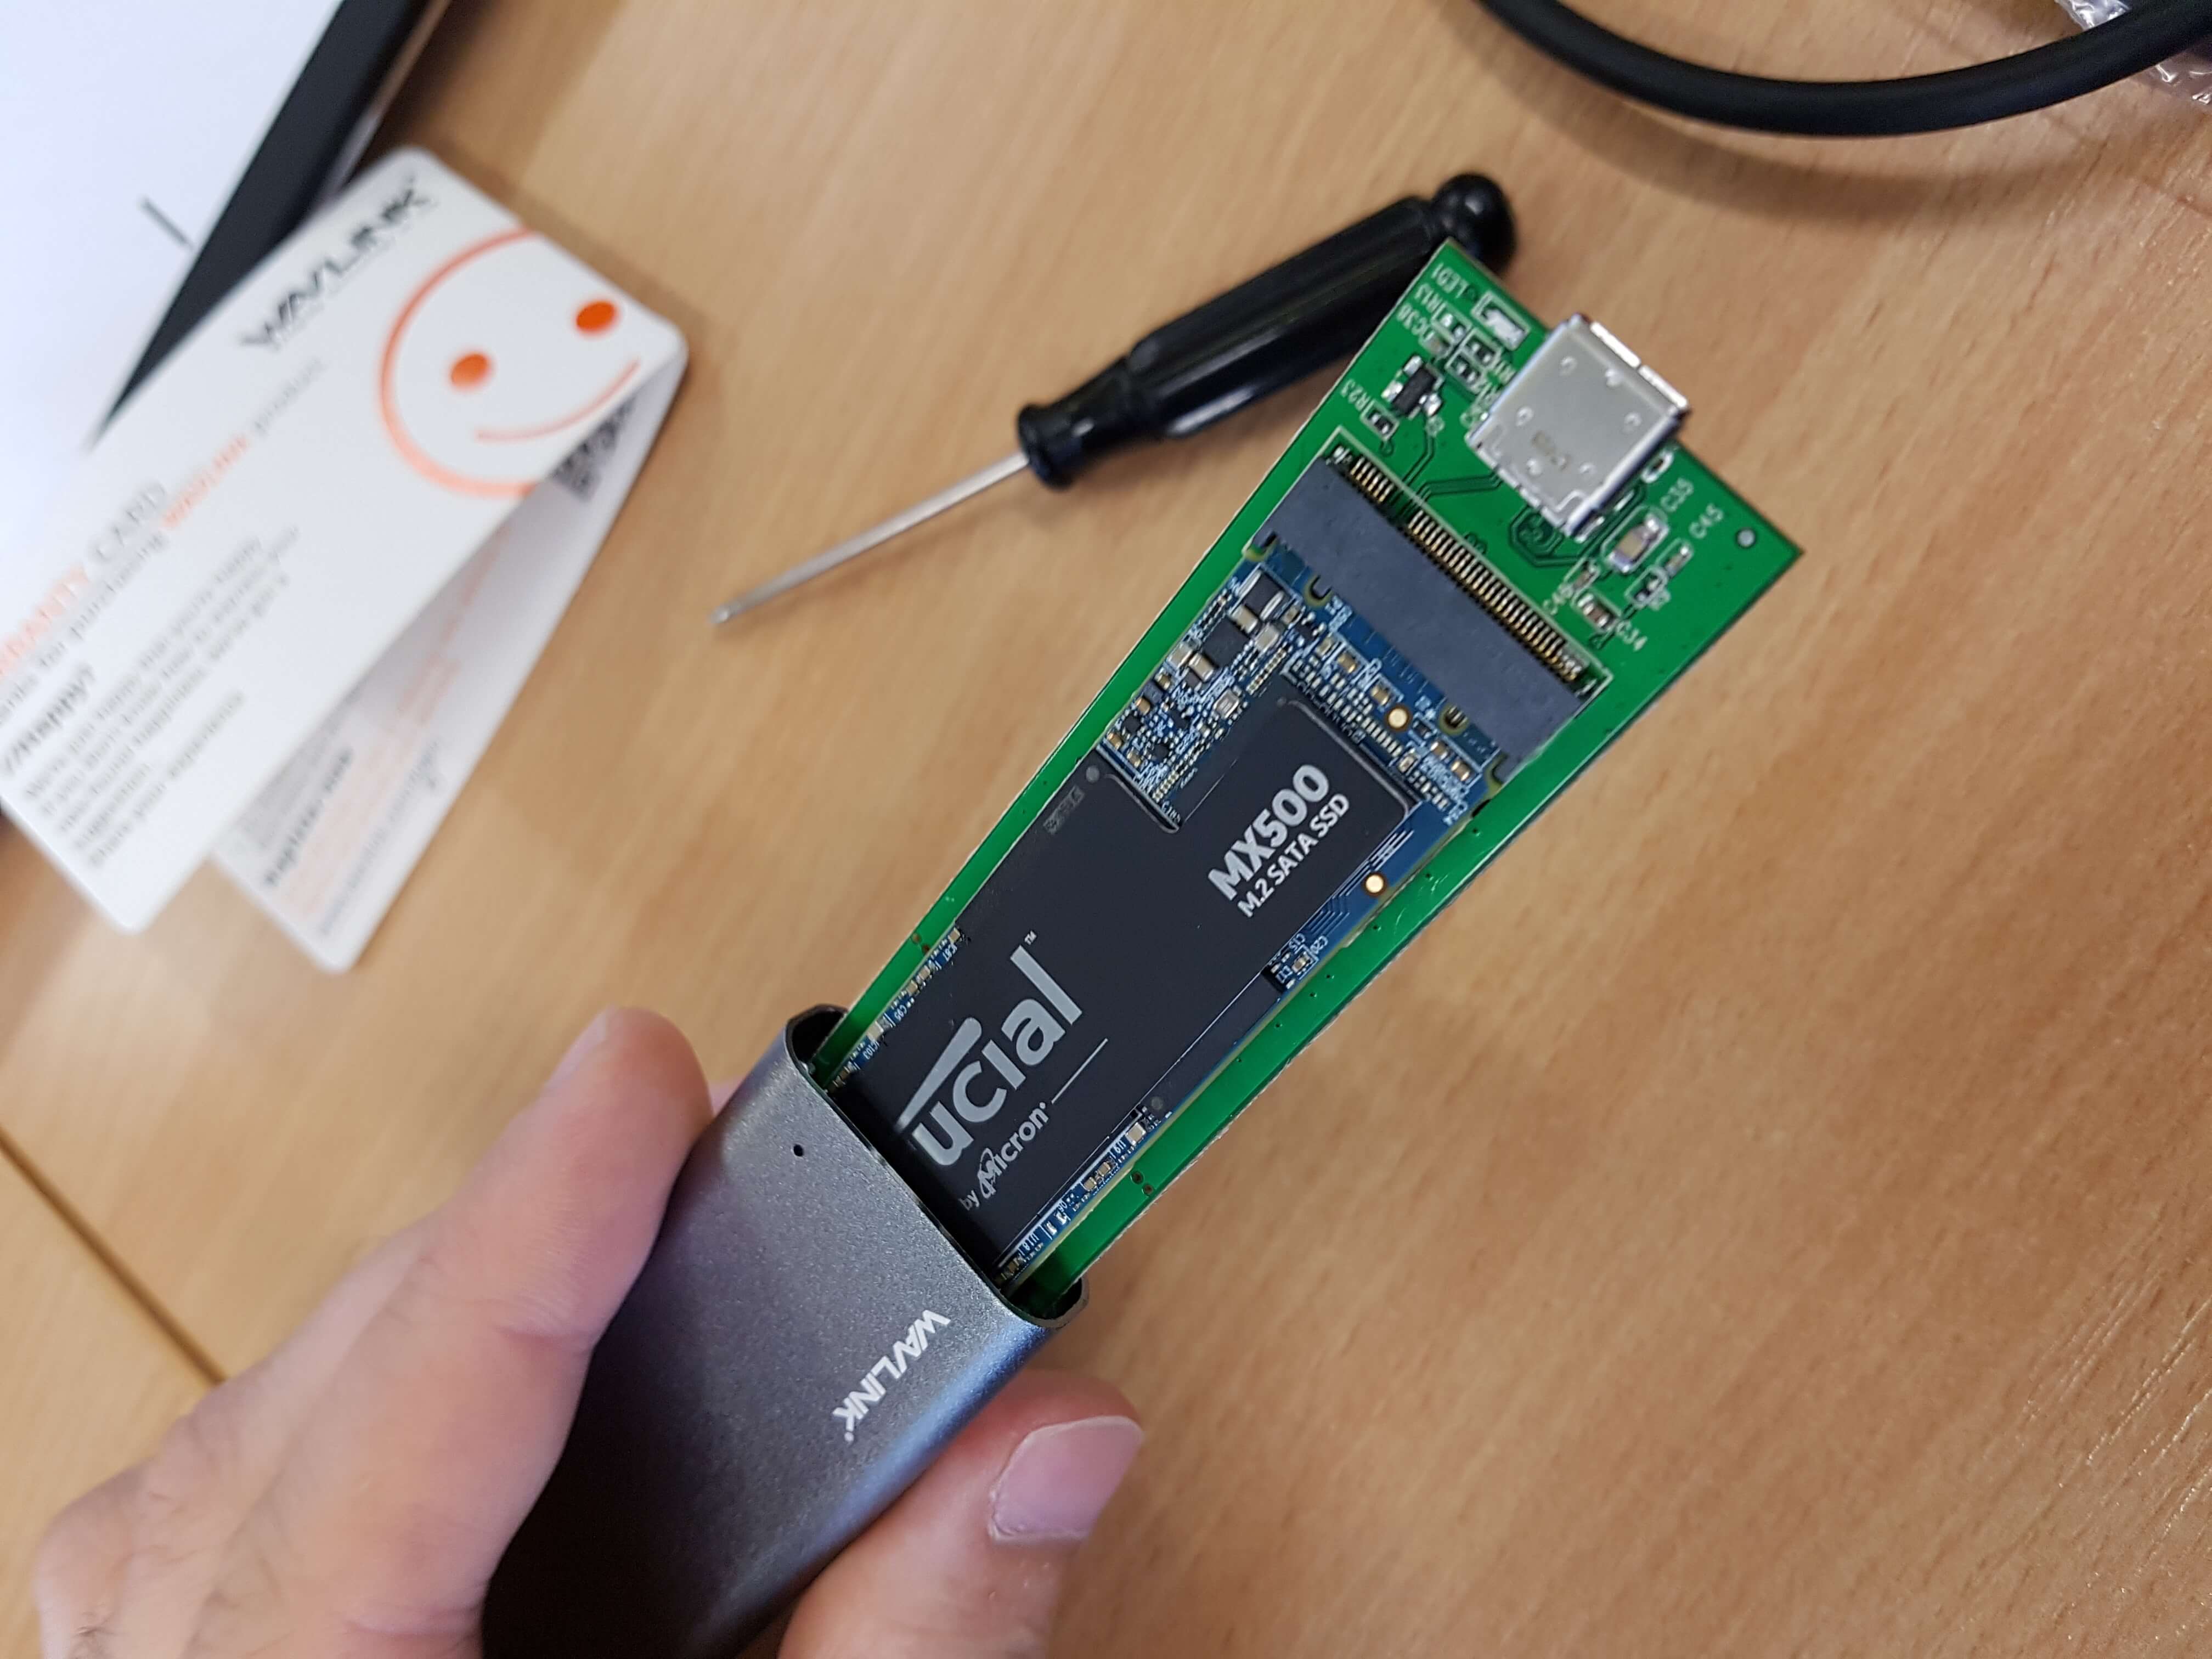
We can now slide in our SSD gently, it will slide it at a 45 degree angle, this is normal. Make sure to slide it in the correct way, you can see how the teeth connect with the M.2 slot on the PCB. There should not be any need for pressure and you shouldn't feel much resistance.
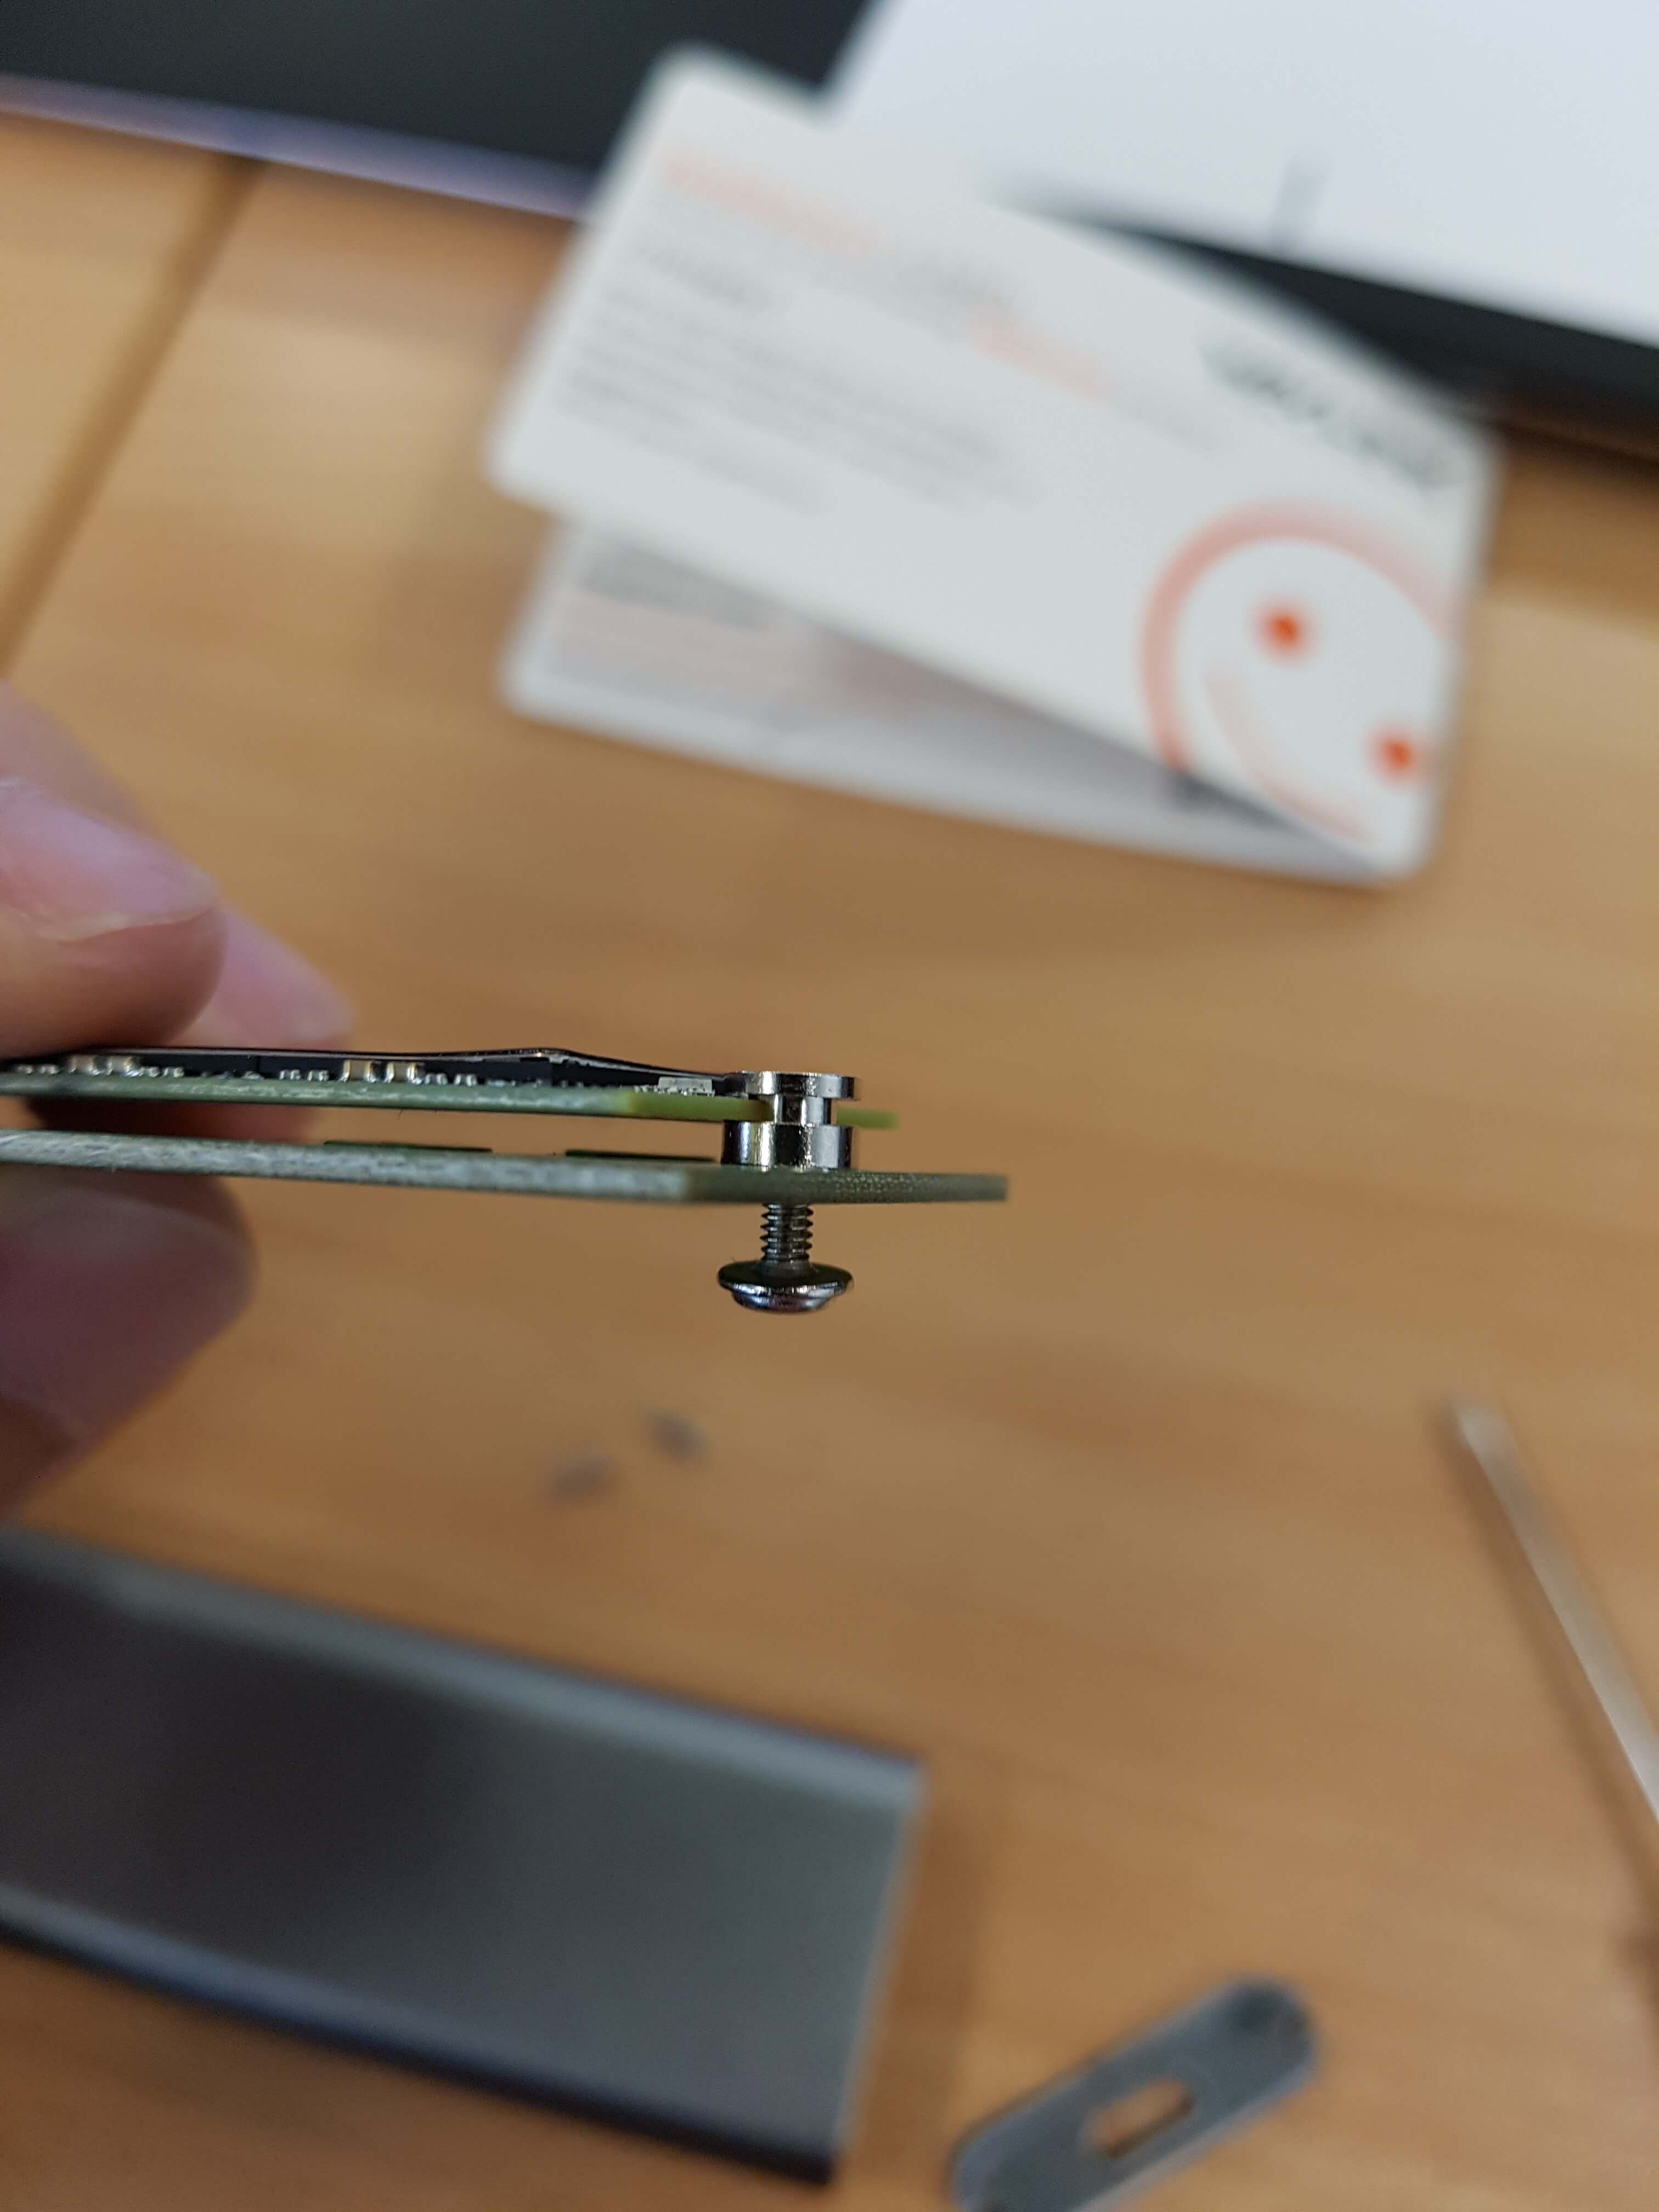
Now you will gently press the SSD down until it is horizontal, and grab the screw and place it against the SSD. You can then begin to tighten it until the SSD is firmly in place.
We can now place back the SSD into the enclosure, and retighten the screws. Make sure NOT to remove the sticky material as it is there to lengthen the space so that your USB can penetrate the enclosure fully.
Here we have the finished product. A very portable small SSD, that I later installed Ubuntu 18.04 on, if you'd like to see that guide you can head over to here:
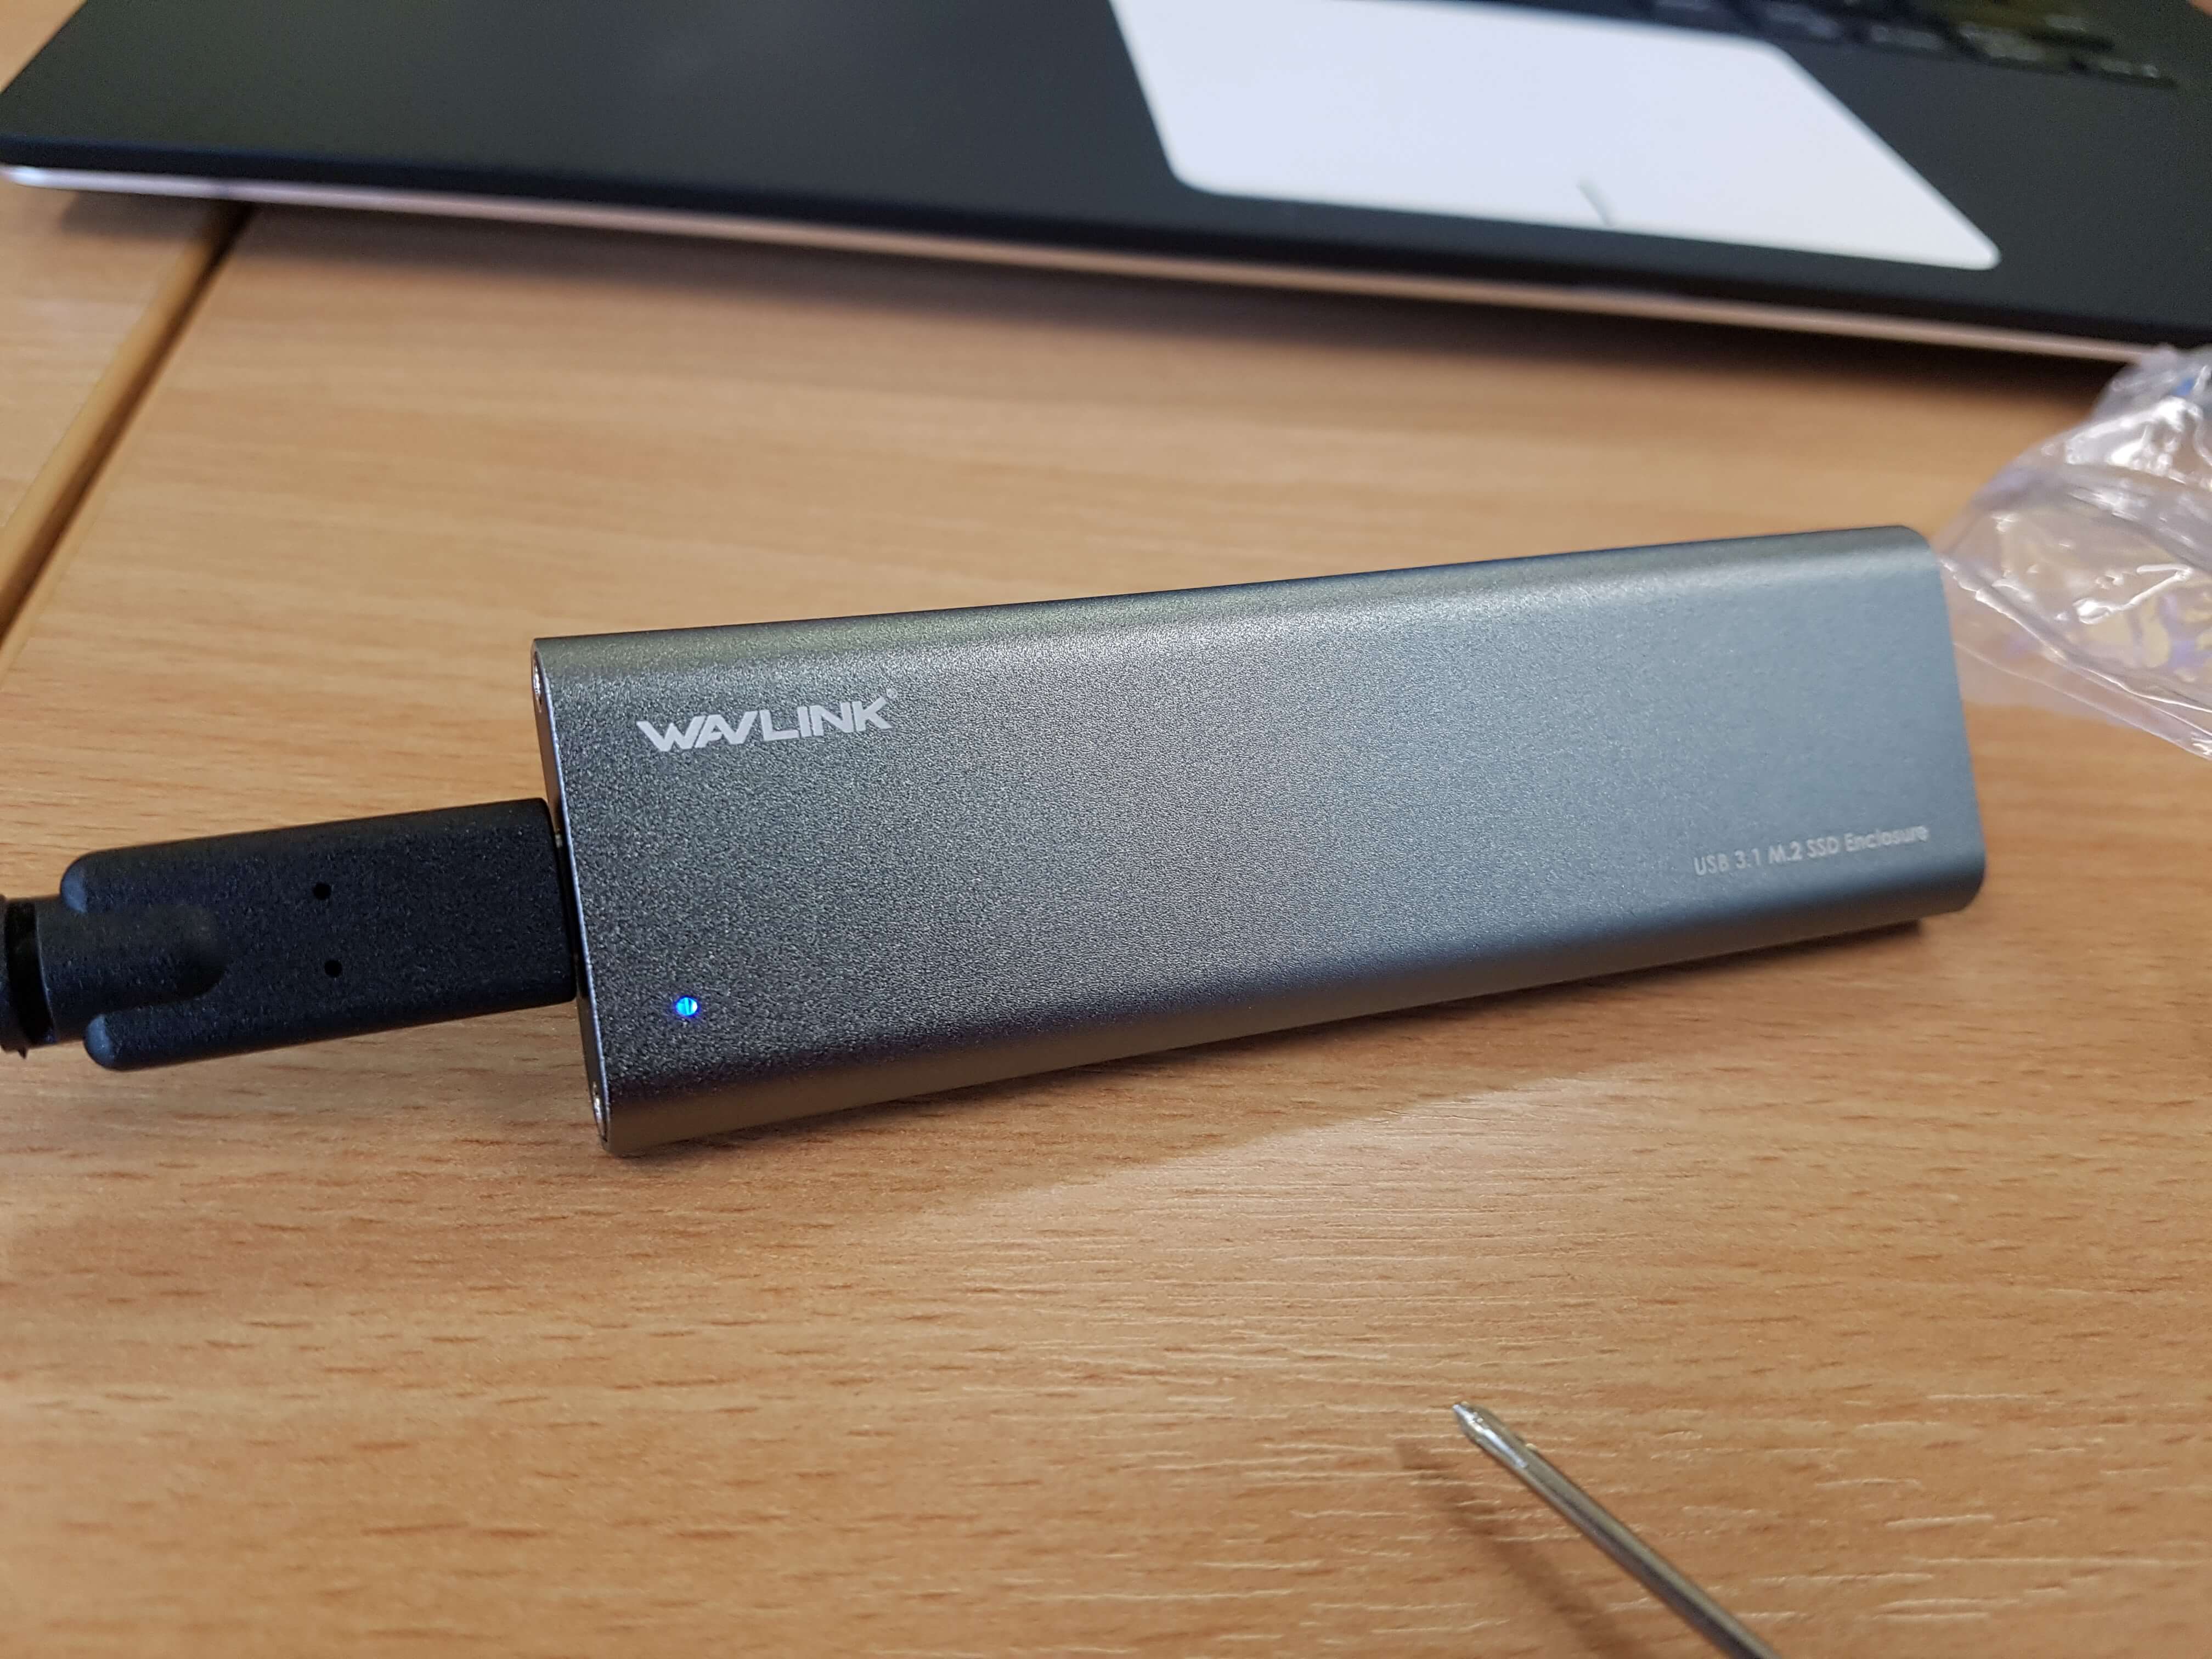
We now have a high-speed external M.2 SSD that we can easily carry around, upgrade, take apart and sell or use as an external OS.
Tips
You can find very cheap SSDs such as the ADATA 128GB, these can seem good but usually do not come with any proper form of warranty and lower performance. Warranty on SSDs such as Samsungs line up come with 3 - 5 years of warranty. To me this is worth the price premium.